Sometimes it is a common thought that in order to have the tasty & healthy food we want, we have to sacrifice our time or we save our time and end up eating not so healthy fair. The following recipe is fast, super easy to make and if you double or triple it you can turn it into tomorrow and the next nights dinner and no one will be the wiser.
The first dish is the base for all the recipes. I prefer it cooked on the BBQ, but doing it in the oven works just as well. Dish #1 is perfect on top of salmon (check out my recipe
here), or as a delicious vegetable side to any meal. The second is pasta sauce, which you could add ground beef to, should you choose to. The third is a version of the tomato soup recipe I shared
previously.
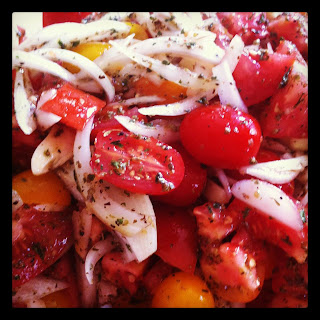 |
| Raw Tomato Mixture |
Tomato Topping - Dish #1
- 1.5 pints of cherry tomatoes + 1 regular tomato (alternatively you could use 7 regular tomatoes)
- 1 medium sized onion, cut into thin strips
- 6 cloves of garlic, peel and cut in half
- EVOO, enough to thoroughly coat mixture
- s & p
- hot sauce, optional
* Cut half of the cherry tomatoes in half, leave the other half whole. Cut the regular tomato into several chunks, about 8. Do the latter for all the tomatoes if not using any cherry tomatoes
* Combine all ingredients in bowl and stir.
* Bake in Pyrex baking dish in the oven at 400 for half an hour or until the tomatoes have wilted and the onions are soft. If cooking on the BBQ place it in aluminum tray and cover with foil, or put directly in foil and wrap so all the ends meet at the top (kind of like Wontons in Wonton soup) you can BBQ it at medium-high for 20-30 minutes (if you are making extras cook it all this way at once)
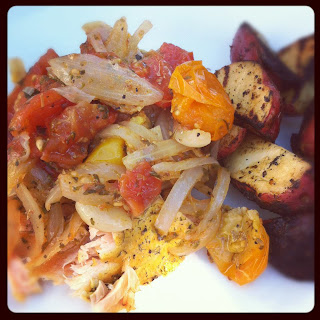 |
| Tomato Topping on Salmon with a Side of Potatoes |
Pasta Sauce - Dish #2
- cooked leftovers/extras from Dish #1
- 1 Tbsp oregano
- 1 Tbsp parsley
- 1 tsp Chili powder
- 1 lb ground beef, browned (optional)
* Add spices to 'Tomato Topping' and warm on stove
* Use immersion blender or regular blender and blend until smooth and a sauce like consistency
* Cook pasta as you usually would and top with sauce
Tomato Soup - Dish #3
- cooked leftovers/extras from Dish #1
- 2 carrots, diced
- 2 celery stocks, diced
- 1 bay leaf
- 4 cups of soup stock or 4 cups of water + 1.5 bouillon cube(s)
* Combine all the ingredients in a pot on your stove, bring to a boil, then turn down and let simmer
* Remove bay leaf, and puree the mixture
Voila... Soup!!! Makes a great lunch or starter for any dinner!


